
Rehydration
Rehydrate logs from cold storage to query historical data beyond your retention period
Rehydration allows you to retrieve logs from your cold storage back into Last9 for querying. This feature enables you to access historical log data that’s beyond your organization’s retention period.
Access the Rehydration feature in your Last9 Control Plane.
Prerequisites
Before you can rehydrate logs, ensure that:
- Cold Storage is enabled for your organization
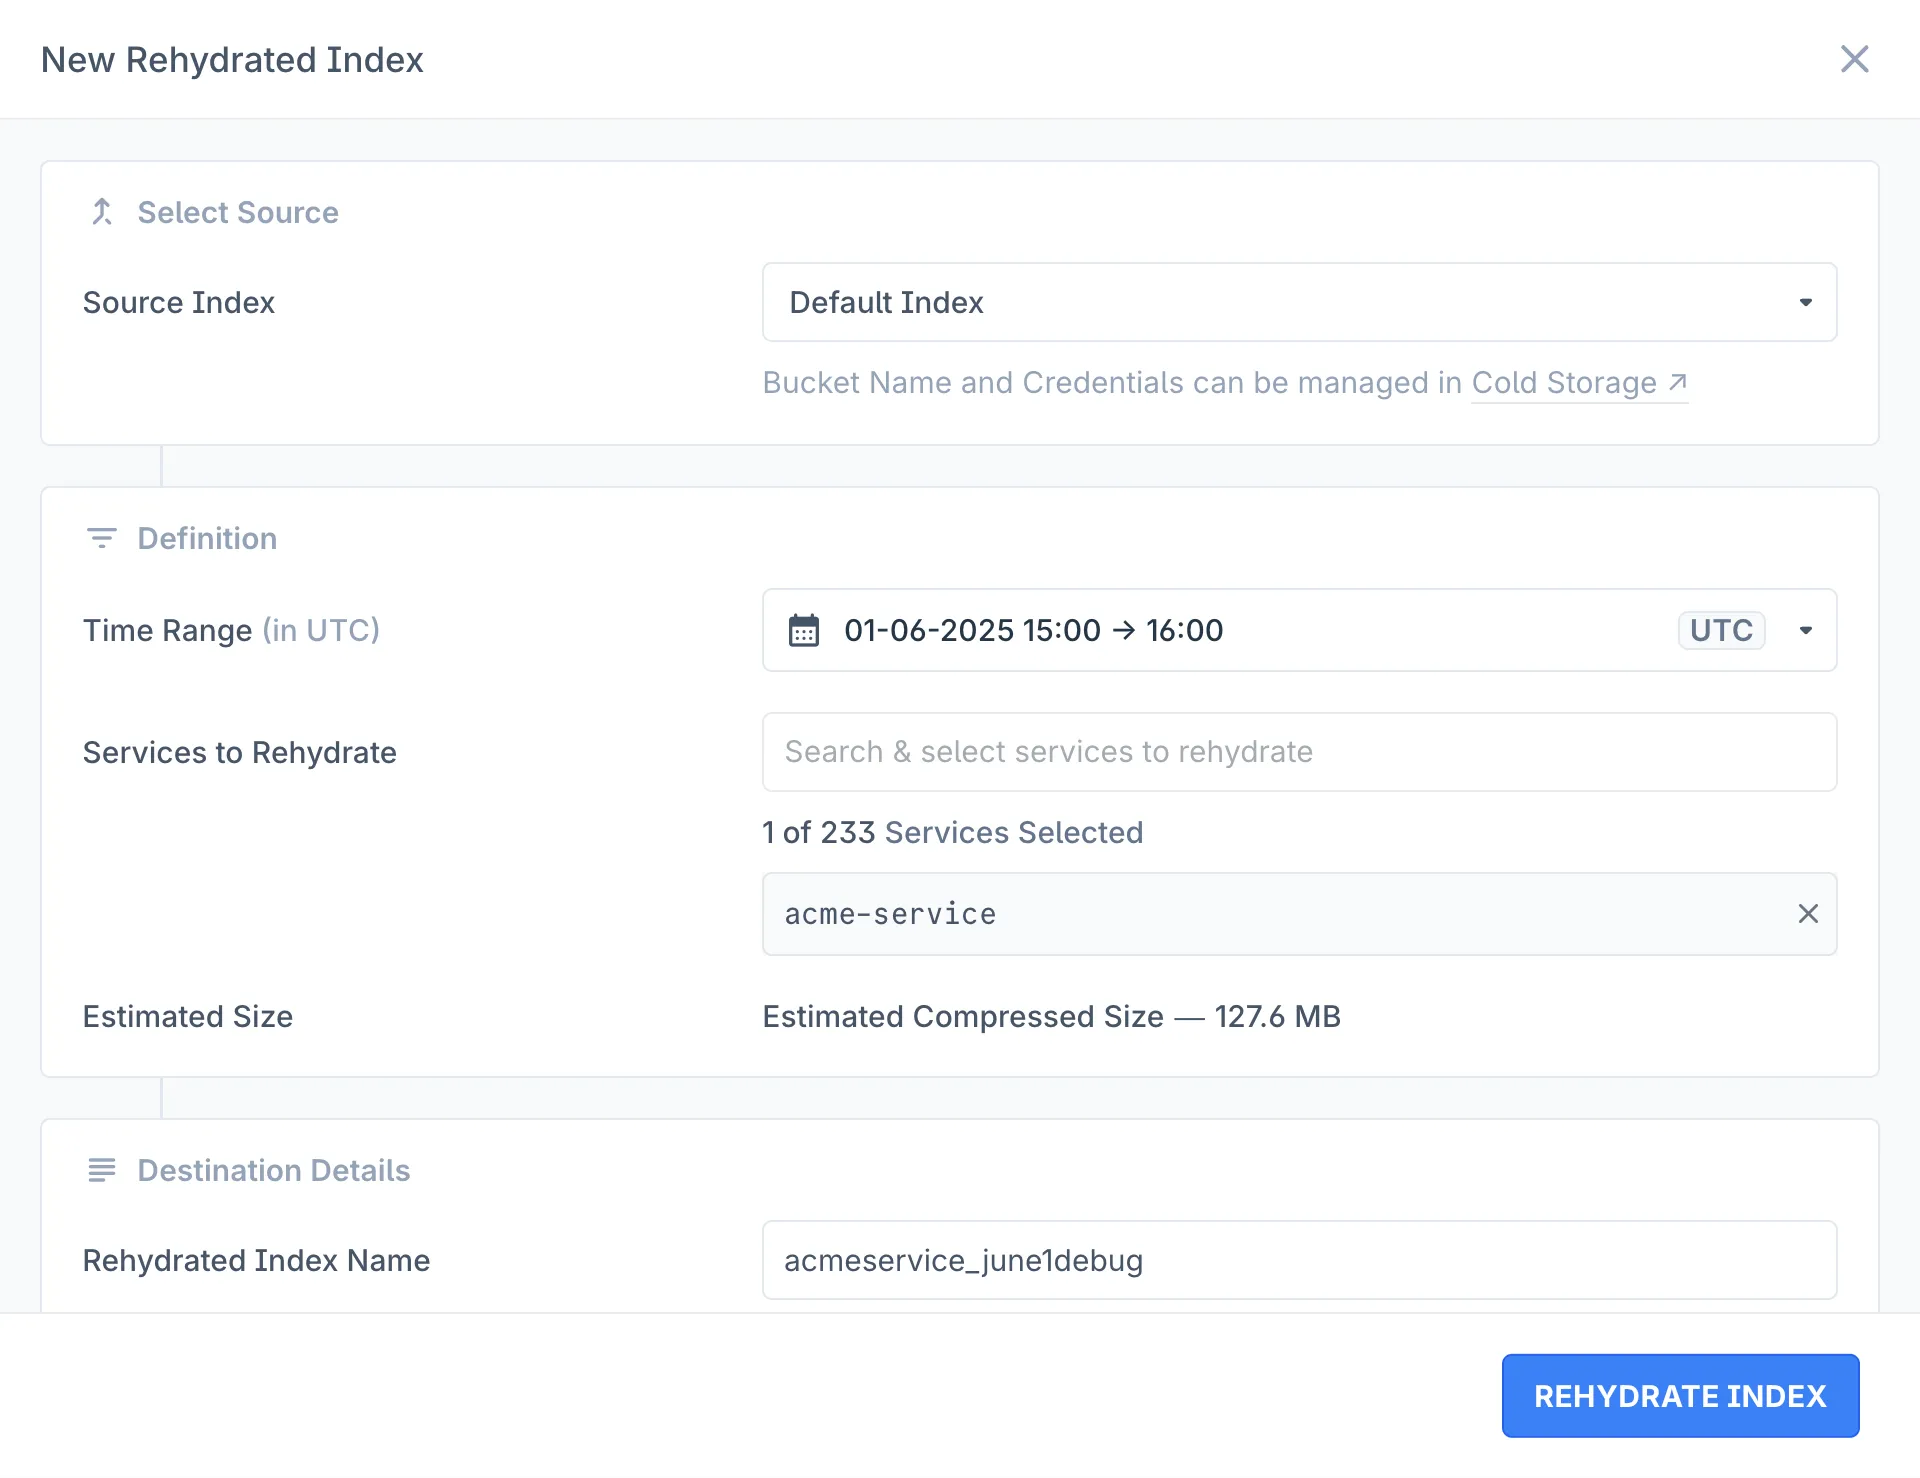
Creating a Rehydrated Index
- Navigate to Rehydration in the Control Plane
- Click New Rehydrated Index to open the configuration modal
- Configure your rehydration settings:
- Select Source: Select from available indexes (typically “Default Index”)

- Add Definition:
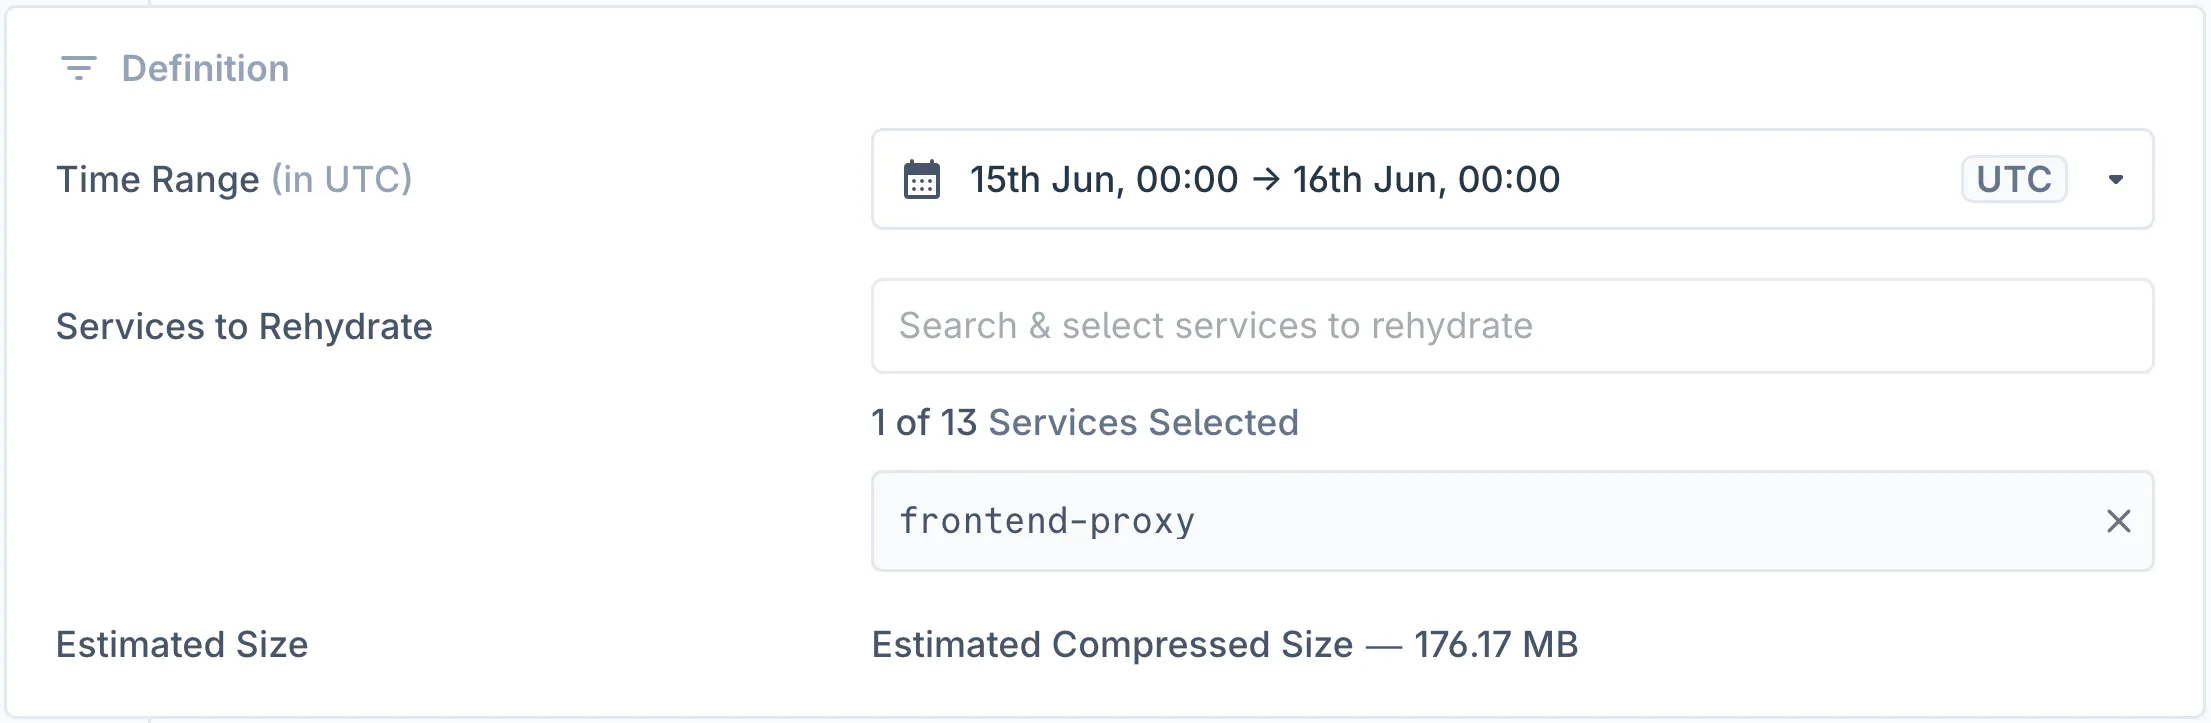
- Time Range: Choose a time period from before your retention period. If your organization has a 14-day retention, you can only select dates older than 14 days
- Services to Rehydrate: If service-level backup is enabled in your cold storage, you can select specific services to rehydrate instead of all logs
- Estimated Size: Review the estimated compressed size of data to be rehydrated
- Set Destination Details:

- Rehydrated Index Name: Provide a descriptive name for easy identification
- Send Notification When Ready (Optional): If you have email channels configured in your organization settings, you can enable notifications to receive updates when the rehydration job completes
- Select Source: Select from available indexes (typically “Default Index”)
- Click Rehydrate Index to start the process
The rehydration job will appear in your index list with an “Index is being rehydrated” status.
Understanding Rehydrated Index States
Your rehydrated indexes can have several different states:
- Index is being rehydrated: Process is currently running
- Available: Index is ready for querying, shows availability window
- Expired: Index has passed its retention period and is no longer queryable
- Failed: Rehydration process encountered an error and needs to be retried
Querying Rehydrated Data
Once your rehydration is complete and shows “Available” status:
- Click the View in Logs button next to your rehydrated index
- This opens the Log Explorer with:
- Your rehydrated index pre-selected
- Time range set to the last 5 minutes of your rehydrated data window
- You can now modify the time range and apply filters to explore your rehydrated data
- Click on Run Query or use the
cmd/ctrl + entershortcut
Managing Rehydrated Indexes
Each rehydrated index includes management options accessible through the more (⋯) menu:
- Rehydrate: Create a new rehydration job for the same time period
- Delete: Remove the rehydrated index to free up storage
Best Practices
- Selective Rehydration: When service-level backup is available, rehydrate only the services you need to reduce processing time and storage costs
- Naming Convention: Use descriptive names that include the date range and purpose, such as
incident_analysis_june_2025orcompliance_audit_q1_2025 - Time Range Planning: Remember that you can only rehydrate data from before your retention period. Plan accordingly when investigating incidents or conducting analysis
Troubleshooting
- Index Failed to Rehydrate: If you see a “Failed — Rehydration Process Failed, Please Retry” message, select “Retry” from the more (⋯) menu or try creating a new rehydration job with the same parameters. If the issue persists, contact support
- No Data Available: Ensure your cold storage contains data for the selected time range and that the time range is before your retention period
Please get in touch with us on Discord or Email if you have any questions.